What Is Nano Banana in 2026? Nano Banana 2 and Pro, Explained
Nano Banana is the nickname that stuck to a Google image family. Google retired the original base in late 2026; Nano Banana 2 and Pro are the two live tiers today. Here is what separates them, how to drive them, and what an edit actually costs.
Scene select — 7 scenes
Nano Banana is a nickname that outgrew its model. It turned up as an anonymous codename on a public model arena, the edits were better than anything else in the lineup, people spent a fortnight trying to work out whose model it was, and by the time Google confirmed it the name was already load-bearing. Google kept it. Two live models wear it now, and the reason you are reading this is almost certainly that you cannot tell which one you want.
Disclose the bias first: we build OpenClips.AI, and both run here. So every number on this page is rendered from the catalog the composer bills against rather than typed by a writer, and the prompts below are the verbatim briefs behind renders you can see.
What Nano Banana actually is
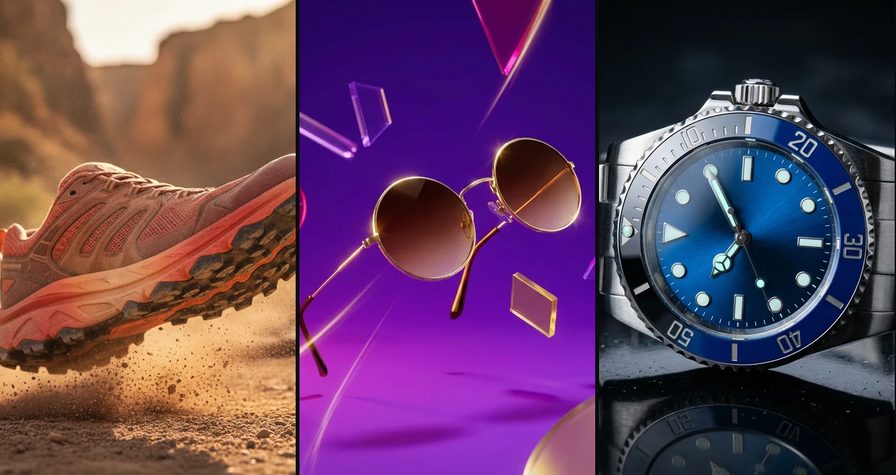
It is an image model from Google, and the thing that made it famous is not generation but editing. Most image models are asked for a picture of something. Nano Banana is asked for a change to a picture you already have: same shoe, new canyon. Same bottle, new light. Same face, new decade.
That distinction decides everything downstream. If you are starting from a blank prompt box, a dozen models will do. If you are starting from a product photo, a headshot or a screenshot and the output has to still be recognisably that thing, the field narrows fast, and this is the family that narrowed it.
Google’s own writeup of the Pro tier is at blog.google, the model card sits on deepmind.google, and the API-side documentation is at ai.google.dev. Those three are the sources worth trusting on what the model is. Everything below is what it is like to actually work with.
The two versions, and which one you want
They are tiers, not generations competing for the same job. Read them as a ladder you move up only when the brief makes you. Google discontinued the original Nano Banana (base) endpoint in late 2026; Nano Banana 2 picks up its job today.
Nano Banana Pro: the studio finish
The rung you move to when someone is going to look closely. Pro is the tier that holds a label straight, keeps a reflection physically plausible and does not quietly redraw the logo on the box. It also takes the widest brief of the three, which matters when a shot has to honour a product, a colourway and a background reference at once.
| Modality | Image |
|---|---|
| Resolutions | 1K, 2K, 4K |
| References | Up to 11 |
| Price | from ⚡31 (from $0.13) |
The Nano Banana Pro page carries its grid and its own edits.
Nano Banana 2: the fast one that got good
The newest of the line and the one most briefs should actually run on. It is the everyday tier after a serious upgrade: fast enough to iterate on, cheap enough to iterate often, and close enough to Pro that the gap only shows when you go looking for it in the corners of a frame.
| Modality | Image |
|---|---|
| Resolutions | 512, 1K, 2K, 4K |
| References | Up to 14 |
| Price | from ⚡16 (from $0.07) |
The Nano Banana 2 page carries the sheet and the version’s own showcase.
How to use Nano Banana, step by step
The workflow is the same wherever you run it, and it is shorter than people expect.
- Bring the photograph. The model is an editor. Give it the real product, the real room, the real face. A generated subject you did not approve first is a subject you will be fighting for the rest of the session.
- Name the subject, then the change. “This pair of sunglasses” then “on a violet gradient with translucent glass shapes”. Subject first, world second. That order is doing real work: it tells the model what must survive.
- Say the frame out loud. Vertical or square, and what the shot is for.
The renders below were briefed as
4:5and1:1because that is what the destination wanted. - Describe light like a photographer. “Bright natural window light”, “a single warm rim light”, “morning sun through mist”. Light is the setting that changes a render most and the one people forget to set.
- Change one thing per pass. When the result is close, do not rewrite the brief. Re-run it with a single altered clause. Iteration beats reinvention, and it is cheaper.
Two real edits, and the prompts that made them
Every image below is our own render, made on the version named beside it, with a product photograph attached as the input and the verbatim brief printed under it. Nothing here is a vendor reel and nothing here is stock.
The sunglasses, on Pro
The Pro tier earning its rung. Gold rims, gradient lenses and translucent glass shapes in the same frame is exactly the kind of shot that goes soft one tier down, because everything in it is a specular highlight.
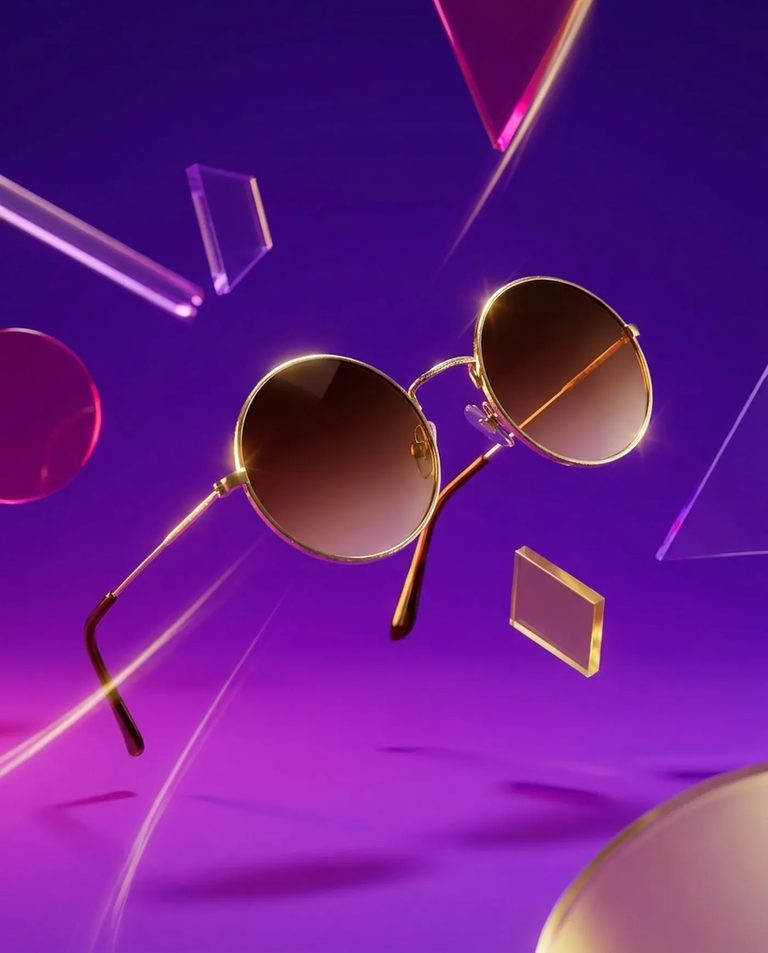
Make a vertical product image of this pair of sunglasses floating through translucent glass shapes on a violet and magenta gradient.Run this prompt →
The dive watch, on Nano Banana 2
The everyday tier doing everyday work, which here means a bezel with legible numerals, a brushed steel case and a reflection that behaves. This is the rung most product briefs should sit on.
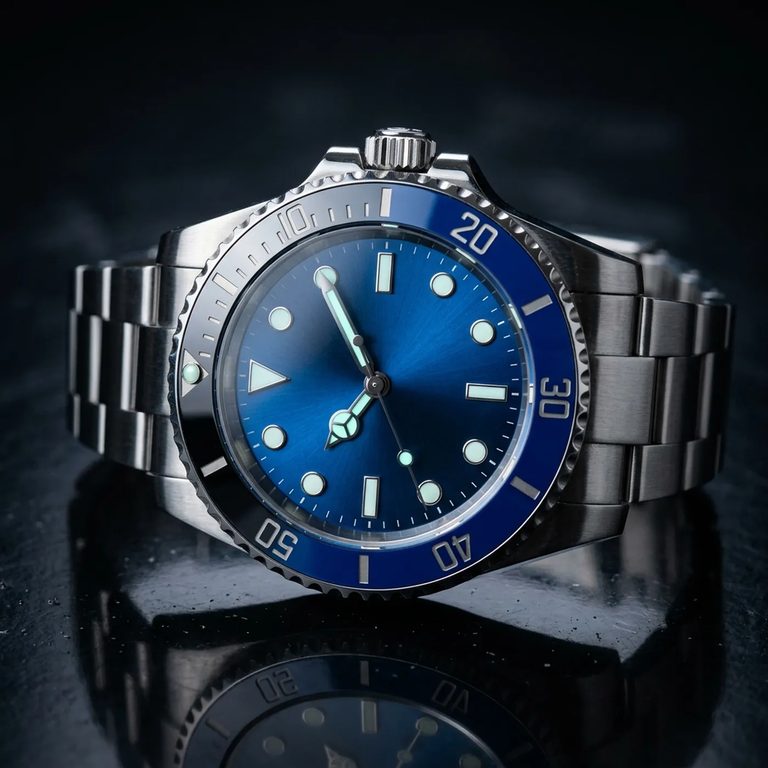
Make a square hero photo of this steel dive watch with its blue dial on a dark reflective surface.Run this prompt →
2
live versions wearing one name
1
photograph before every edit
1
clause changed per pass
What Nano Banana is bad at
An honest guide names the failures, so here they are, and they are the same three failures on every tier.
Long text inside the image. A short label survives more often than it used to. A paragraph of packaging copy still comes back as convincing nonsense, and the higher tiers fail more expensively because the nonsense looks better set. If the words matter, set them in a layout tool afterwards.
Anything with a countable structure. Fingers, teeth, keyboard rows, watch complications, the number of buttons on a shirt. Editing is not counting, and the model does not know how many of a thing there ought to be.
A subject it never saw. It is an editor. Ask it to invent a product from scratch and it will oblige, and you will spend the next hour explaining to yourself why the packaging is subtly wrong. Photograph the thing, then edit the photograph.
Style drift across a long session. Ten passes in, the grade has crept. Go back to the approved frame rather than to the last one, and re-run the single clause you meant to change.
Where to run it, and what a render costs
Google runs Nano Banana inside the Gemini app on whatever plan you already hold there. On OpenClips.AI both live versions run on one balance beside the video models, which is the point of having them here: draw the frame on a Nano Banana tier, then hand the approved frame to a video model without changing tools or wallets.
The price row in each table above is the floor with its pack-rate dollar, computed at our published pack rate rather than typed. Free to try on the image models: ⚡50 lands on signup, no card, and the price shows on the button before you press it.
The short version
- Nano Banana is an editor. Bring a photograph, name the change.
- Nano Banana 2 for nearly everything, Pro when a customer will look closely.
- Subject first, world second. That sentence order is the whole technique.
- One clause per pass once you are close. Cheaper and faster than a rewrite.
- Text and counting are still the failure modes. Set copy in a layout tool.
Start on the Nano Banana page, or open the models roster and put the frame you just drew into motion.